The safest way to handle one of these is to slow down and clean it in stages: read the care label, test a hidden seam, lift the loose dirt first, then treat each stain by the fabric it sits on, and finish by air-drying in shade. A wool body with leather sleeves is two different materials sewn together, and the mistake that ruins jackets is treating them like one. Allow a few hours of unhurried work plus drying time, and the hardest part is patience.
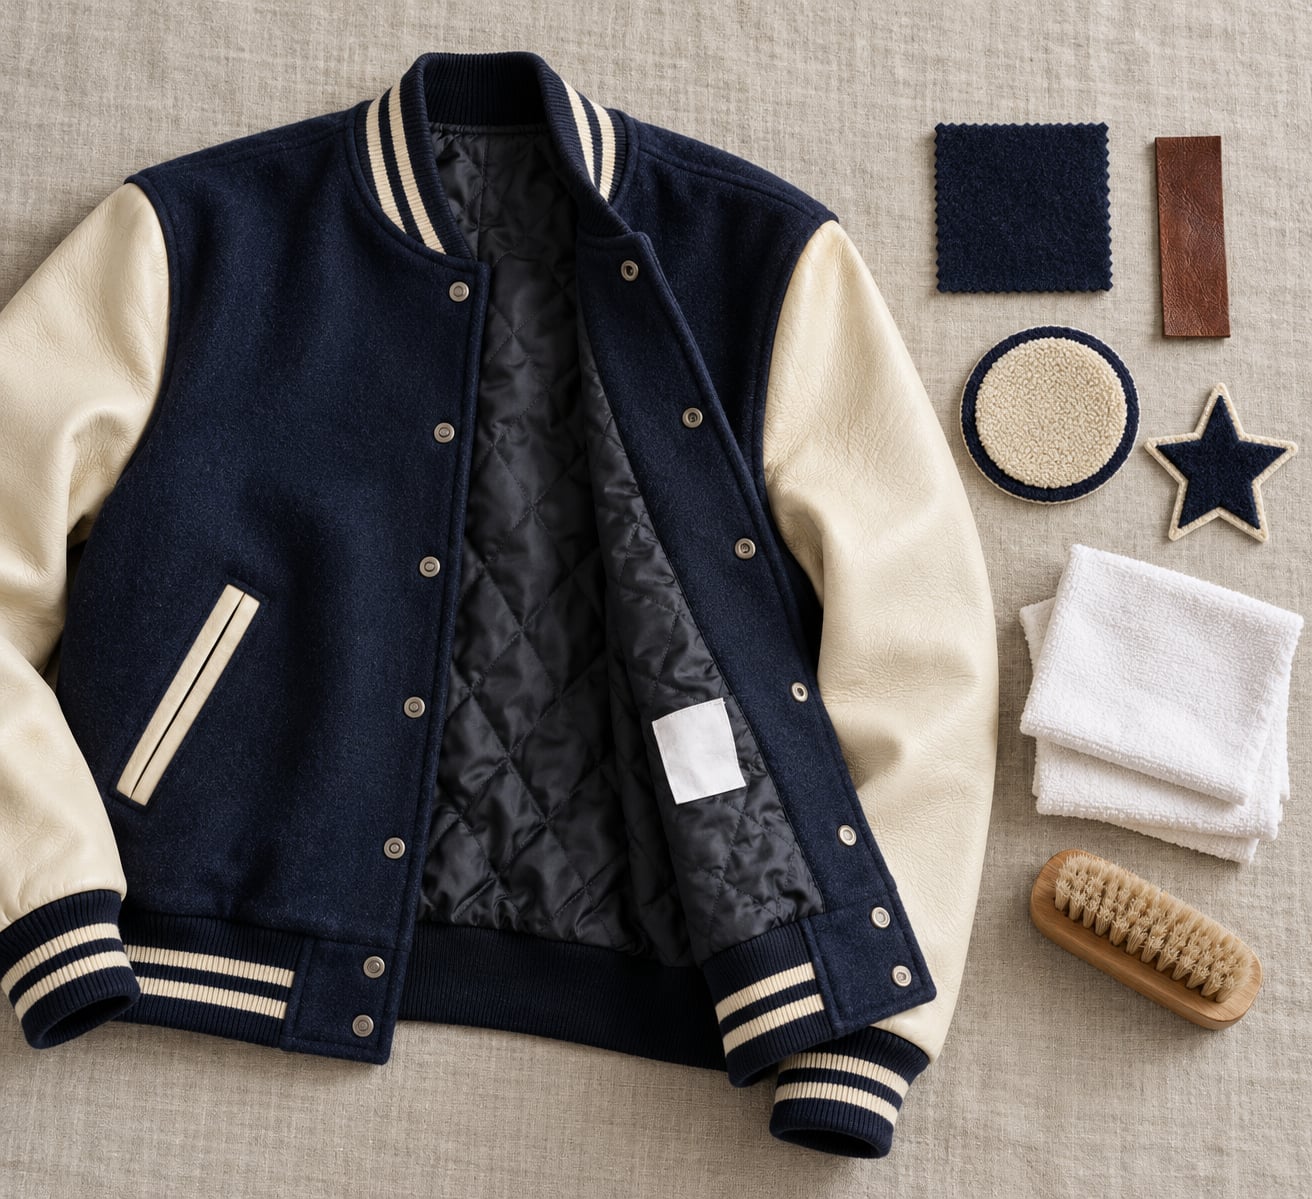
Most vintage team jackets combine wool melton, leather sleeves, a satin lining, chenille patches, embroidered graphics and ribbed trim. Each of those reacts to water and detergent differently, and the patches are often glued or appliqué rather than stitched. That is why a method that works on a modern fleece jacket can permanently warp lettering that took fifty years to look the way it does.
Table of Contents
- What You Need
- How to Clean a Vintage Team Jacket Step by Step
- Decide How to Clean a Vintage Team Jacket Safely
- 1. Empty the Pockets and Test Hidden Areas
- 2. Remove Loose Dirt Without Rubbing the Graphics
- 3. Treat Stains According to the Fabric
- 4. Wash Only When the Care Label Allows It
- 5. Rinse and Remove Soap Without Soaking
- 6. Press or Reshape the Jacket Carefully
- 7. Air-Dry in Shade With Good Ventilation
- Common Mistakes
- Frequently Asked Questions
- Conclusion: Start With the Care Label
What You Need
Gather these before you start, because interrupting a cleaning halfway to find supplies is how jackets get left sitting in water.
- The jacket’s sewn-in care label, read before anything else
- Soft-bristled brushes, including one small enough to work around chenille and snaps
- A vacuum with an upholstery attachment
- A mild, pH-balanced detergent or wool-safe detergent
- Material-specific stain removers: leather soap for sleeves, a solvent-free spot treatment for wool
- White microfiber cloths or plain cotton rags, several of them
- A basin, sink, or padded drying surface
- A drying rack or a wide padded hanger
- A press, iron, or steamer for reshaping, used only if the label permits heat
Two situations justify professional help straight away. A wool-bodied leather-sleeved jacket that is structured with heavy interlining and cannot be taken apart is a specialist job, and so is anything with active mold, a lining that feels gritty with dried residue, or a sleeve leather that is already cracked and flaking. A cleaner who works on vintage outerwear can also spot-test dyes you cannot see at home.
How to Clean a Vintage Team Jacket Step by Step
Work in this order and you will rarely have to undo damage: identify, test, dry-clean the surface, treat stains by material, wet-wash only if permitted, rinse, reshape, air-dry. The oldest and most fragile areas get the gentlest treatment every single time.
Decide How to Clean a Vintage Team Jacket Safely

Finding out how to clean a vintage team jacket safely comes down to matching method to material, and the care label is the only reliable guide you have. A label that says dry clean only means spot cleaning at home with a solvent used sparingly and never near glued patches. No label, or a label you cannot read, means treat the jacket as wool, treat the sleeves as leather, and treat everything else as spot-clean only.
Look at the construction, not just the fiber content. Wool body and leather sleeves means no full immersion at all. Satin or rayon lining means gentle hand work and a flat dry. Nylon or polyester body means a machine gentle cycle may be fine, provided there are no glued appliqués. Quilted insulation with old batting means surface cleaning only. Embroidered or felt graphics sewn on can tolerate light damp work; chenille patches and glued felt cannot.
1. Empty the Pockets and Test Hidden Areas
Empty every pocket, including the pen sleeve if there is one. Loosen cuffs, snaps and zippers so the panels can lie flat, and turn the jacket inside out when the label calls for it.
Then test on an inside seam allowance or under the back neck. Dab with your cleaning solution, wait a few minutes, and check three things: did color transfer to the cloth, did the surface look distorted or shiny afterward, and did any adhesive or patch edge lift. Any one of those means stop with that product and use something gentler.
2. Remove Loose Dirt Without Rubbing the Graphics
Start dry, always. Work a soft brush across the body panels with the nap, holding the fabric taut so the brush does not drag loose fibers. Work around chenille letters and embroidery rather than over them, and lift dust from snaps with a soft-bristled toothbrush.
The upholstery attachment on a vacuum, held an inch or two off the surface, pulls dust out of seams and away from patch edges. Never press it directly onto chenille or embroidery, where the suction and the beater bar can lift threads. On leather sleeves, vacuum with the nozzle hovering and use the brush head only if the leather is not already flaking.
3. Treat Stains According to the Fabric
Blot, always. Scrubbing pushes a stain deeper and fuzzes the wool, which is where the original factory press job used to be.
- Wool and sweat marks: a barely damp cloth with cool water and a drop of wool-safe detergent, blotted from the outside inward, then rinsed with a second damp cloth. Change cloths as soon as one looks grimy.
- Oil on wool: work a small amount of detergent into the spot with a fingertip before adding water, then blot. Do not soak the whole panel to chase a one-inch mark.
- Grass and food on nylon or polyester: a drop of mild detergent in cool water, blotted repeatedly. Synthetic shells rarely stain permanently if you get to them early.
- Leather sleeves: damp sponge with leather soap, worked in small circles, then a clean barely damp cloth to remove the film. Never dish soap, never a soaked rag left sitting on the hide.
- Quilted areas: the batting underneath holds moisture for weeks, so clean the surface only and keep the water amount tiny.
Never pour a cleaning solution over a chenille patch or a glued appliqué. Solvents lift dye out of the yarn and can loosen adhesive. Test areas are there for exactly this reason, so honor them.
4. Wash Only When the Care Label Allows It
A fully washable synthetic jacket with no glued graphics and no leather trim can go in the machine on a cool gentle cycle with a small amount of mild detergent. No bleach, no heat, no fabric softener, no long soak. Close the jacket, zip the front if it zips, and turn it inside out if the label says so.
Wool, leather, structured jackets, vintage patches and non-washable trims do not belong in a washer. Wool felts and shrinks with agitation and heat, leather stiffens and cracks as it soaks and dries unevenly, and old thread loses strength long before the fabric looks tired.
5. Rinse and Remove Soap Without Soaking
The goal is to remove trapped soap without saturating anything. Squeeze nothing, twist nothing, and never hold one end of the jacket and let the other end hang in a basin, because that is how a wool panel stretches.
For hand cleaning, dip and lift the cloth rather than the jacket, then flush the treated area with repeated cool water until the cloth comes away clear. For machine-washed synthetics, run an extra cool rinse cycle. For leather, rinse with a barely damp cloth and stop as soon as the soap is gone.
6. Press or Reshape the Jacket Carefully
Drying is the reshaping step. While the fabric is still damp, lay the sleeves along the body, smooth the front panels flat, and roll the ribbed cuffs and collar into loose cuffs rather than stretched ones. The garment will keep that shape.
Heat is optional and only when the care label allows it. If it does, use the lowest setting with a clean white cloth between the iron and the garment, press rather than iron, and never let the iron touch a patch, a letter, a snap, or a coated shell directly. Steam from a distance is gentler than a pressing face. When in doubt, skip it; a little residual wrinkle beats a melted chenille edge.
7. Air-Dry in Shade With Good Ventilation

Hang the jacket on a wide padded hanger or lay it flat on a rack, whatever holds its shape without pinching the shoulders. Turn the graphics outward so you can watch them, and support heavy damp patches with folded white cloth so they do not stretch while saturated.
Keep direct sun, radiators, tumble dryers and strong airflow off it. Rotate the jacket after a few hours so both sides dry evenly, and expect a quilted or lined jacket to take a full day, sometimes longer. Before you put it away, check for color transfer on the cloth you tucked underneath, damp spots in the seams, lingering odor, and any thread that lifted during cleaning.
Common Mistakes
- Machine-washing an unstructured or wool jacket. The wool felts, the interlining shrinks, and the shape never comes back. Spot clean or hand clean instead.
- Hot water. It sets protein stains on wool and drives oil deeper. Cool or lukewarm, always.
- Scrubbing a stain. It fluffs the wool and dulls chenille. Blot, repeat, change cloth.
- Soaking leather sleeves. Hide that has been wet for an hour dries stiff and cracks along the fold lines. Damp sponge, small areas, dry fast.
- Drying in direct sun. Faded body panels, bleached lettering and stiffened ribbing. Shade and moving air.
- Ironing decorations. Direct heat melts appliqué edges and flattens embroidery. Cloth barrier, low heat, or nothing.
- Trusting a faded label. When the label is unreadable, assume the gentlest method and let a professional handle anything valuable.
Two habits cover most of these mistakes. Test first and work one small area at a time, and stop the moment dye, adhesive, leather or an embellishment begins to change rather than trying to correct it with a stronger product.
Frequently Asked Questions
Can you put a vintage team jacket in the washing machine?
Only if the care label allows it and the jacket has no wool, no leather trim, and no glued patches or chenille lettering. Wool felts and shrinks in a washer, leather dries stiff, and glued graphics can lift. For anything mixed-material or structured, empty the pockets, spot clean the body and sleeves separately, and air-dry flat or on a padded hanger.
How do you remove bad odors from a vintage team jacket?
Start with air: hang the jacket outdoors on a dry day or near an open window for a few hours, then air it overnight before anything wet. For musty storage smell, lay white cloth dampened with a diluted white vinegar solution inside the body for a few hours, blot with a clean damp cloth, and air-dry. Never soak for odor. Baking soda in a breathable bag helps with closet smells, not fabric odor.
How should I clean a jacket with leather sleeves?
Wipe the sleeves with a barely damp sponge and a small amount of leather soap, working in small circles rather than soaking a rag on the hide. Wipe again with a clean damp cloth, then let them air-dry away from heat. Once fully dry, apply a leather conditioner to keep the old hide supple. Skip dish soap, which strips oils and leaves leather stiff and cracked.
Can you wash a vintage satin-lined team jacket?
Do not put the whole garment in a washer. Satin and rayon linings lose their sheen, spot weld, and can shrink away from the body at the seams. Turn the jacket inside out, clean the lining with a soft cloth and cool water plus a drop of mild detergent, blot rather than rub, and rinse with a second damp cloth. Hang the jacket on a padded hanger and let it dry fully before wearing.
What should I do if the care label is missing?
Identify the materials by hand. Hold the body fabric to the light to check for wool or synthetic fibers, look for a grain on the sleeves to spot leather, and note whether graphics are stitched, glued, or chenille. Then choose the gentlest method that matches: spot clean the wool, damp-wipe the leather, and never submerge a jacket with glued decorations or an unreadable construction.
Conclusion: Start With the Care Label
The safest order rarely changes: identify the materials, test a hidden seam, lift loose dirt dry, treat each stain by the fabric underneath it, wet-clean only when the label permits, and air-dry in shade with nothing hot nearby. Work that sequence slowly and a jacket that has hung in a closet for thirty years can come out looking cared for instead of washed.
Begin with the least aggressive method and stop the moment dye lifts, adhesive softens, leather changes texture, or an embellishment shifts. At that point the answer is a specialist, not a stronger product. For collectors, that stop is the whole point, since the patches and lettering are usually worth more than any cleaning job would cost.